How to setup cPanel WHM DNS clusters

Its a good idea to have different physical name servers for your websites for better redundancy. If you are using cPanel to host your websites, it is plain simple to setup a fully working DNS cluster.

In this tutorial, we’ll be setting up a DNS cluster in cPanel.

Besides your main cPanel server, you will need two additional servers or VPS. To lower the risk even more, we can setup these servers from different hosts or locations. As with cPanel, these should be running the CentOS operating system.
You can get cheap $5 per month 512MB 1GB droplets from Digitalocean and install CentOS 6 on it.

Install cPanel DNSONLY

After you have setup your server, its time to install cPanel’s DNSONLY software. Its a watered down version of the normal cPanel/WHM software. You do not even get a DNS zone editor, but that’s fine. You won’t be editing any zones on these servers manually.

cd /root
mkdir cpanel-dnsonly
cd cpanel-dnsonly
curl -o latest-dnsonly -L https://securedownloads.cpanel.net/latest-dnsonly

cPanel states that you need a minimum of 768MB ram to install the software and if your server does not have that required ram, installation will quit with an error. However my DNS servers never use more than 200MB. Maybe it is required for the installation/compiling. Anyway, you can hack the installation process to accept your 512MB ram.

Run the bash script with the keep switch.


sh latest-dnsonly --keep

After running the above command, a new installd directory will be created inside the /root/cpanel-dnsonly directory. You need to open the install file inside and change the following to as below.

my $min_memory_rules = {
    default => 256, # changed this to 256 from 768

After that, you need to run the below file in the same folder (/root/cpanel-dnsonly/installd)

./bootstrap-dnsonly


Setup DNS Cluster

Once the cpanel DNSONLY software has finished installing, you open your browser and go to

https://server-ip:2087

The username will be root  and the password will be your server’s root password.

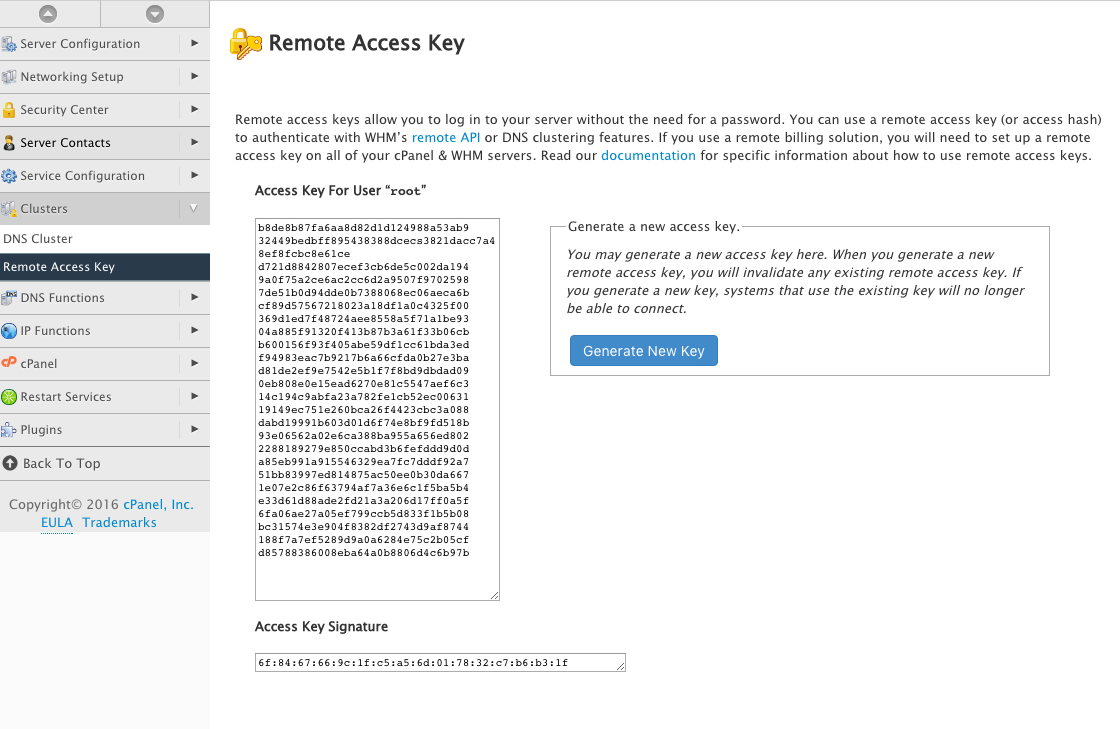
Once logged in, go to Clusters > Remote Access Key and generate a new key. This key will be used by your main server to access the DNS server.

generate-new-key

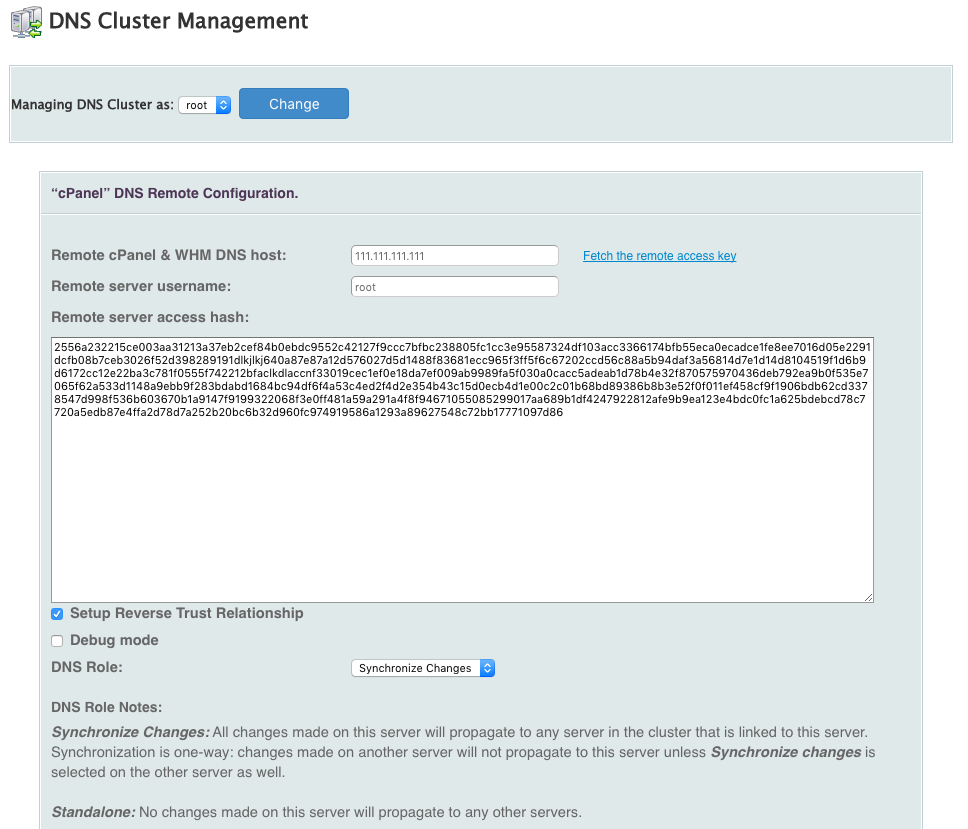
Now login to your main cpanel server and go to Clusters > DNS Cluster. You should now click on Enable DNS clustering  and add a new server to the cluster. Choose cPanel as the backend type. You need to enter your DNS server’s IP address and the remote access key that you copied earlier from your DNS server.

Tick Setup Reverse Trust Relationship and choose Synchronize Changes as the DNS role. With this setting, your main server will push changes to your DNS servers.

add-dns-server

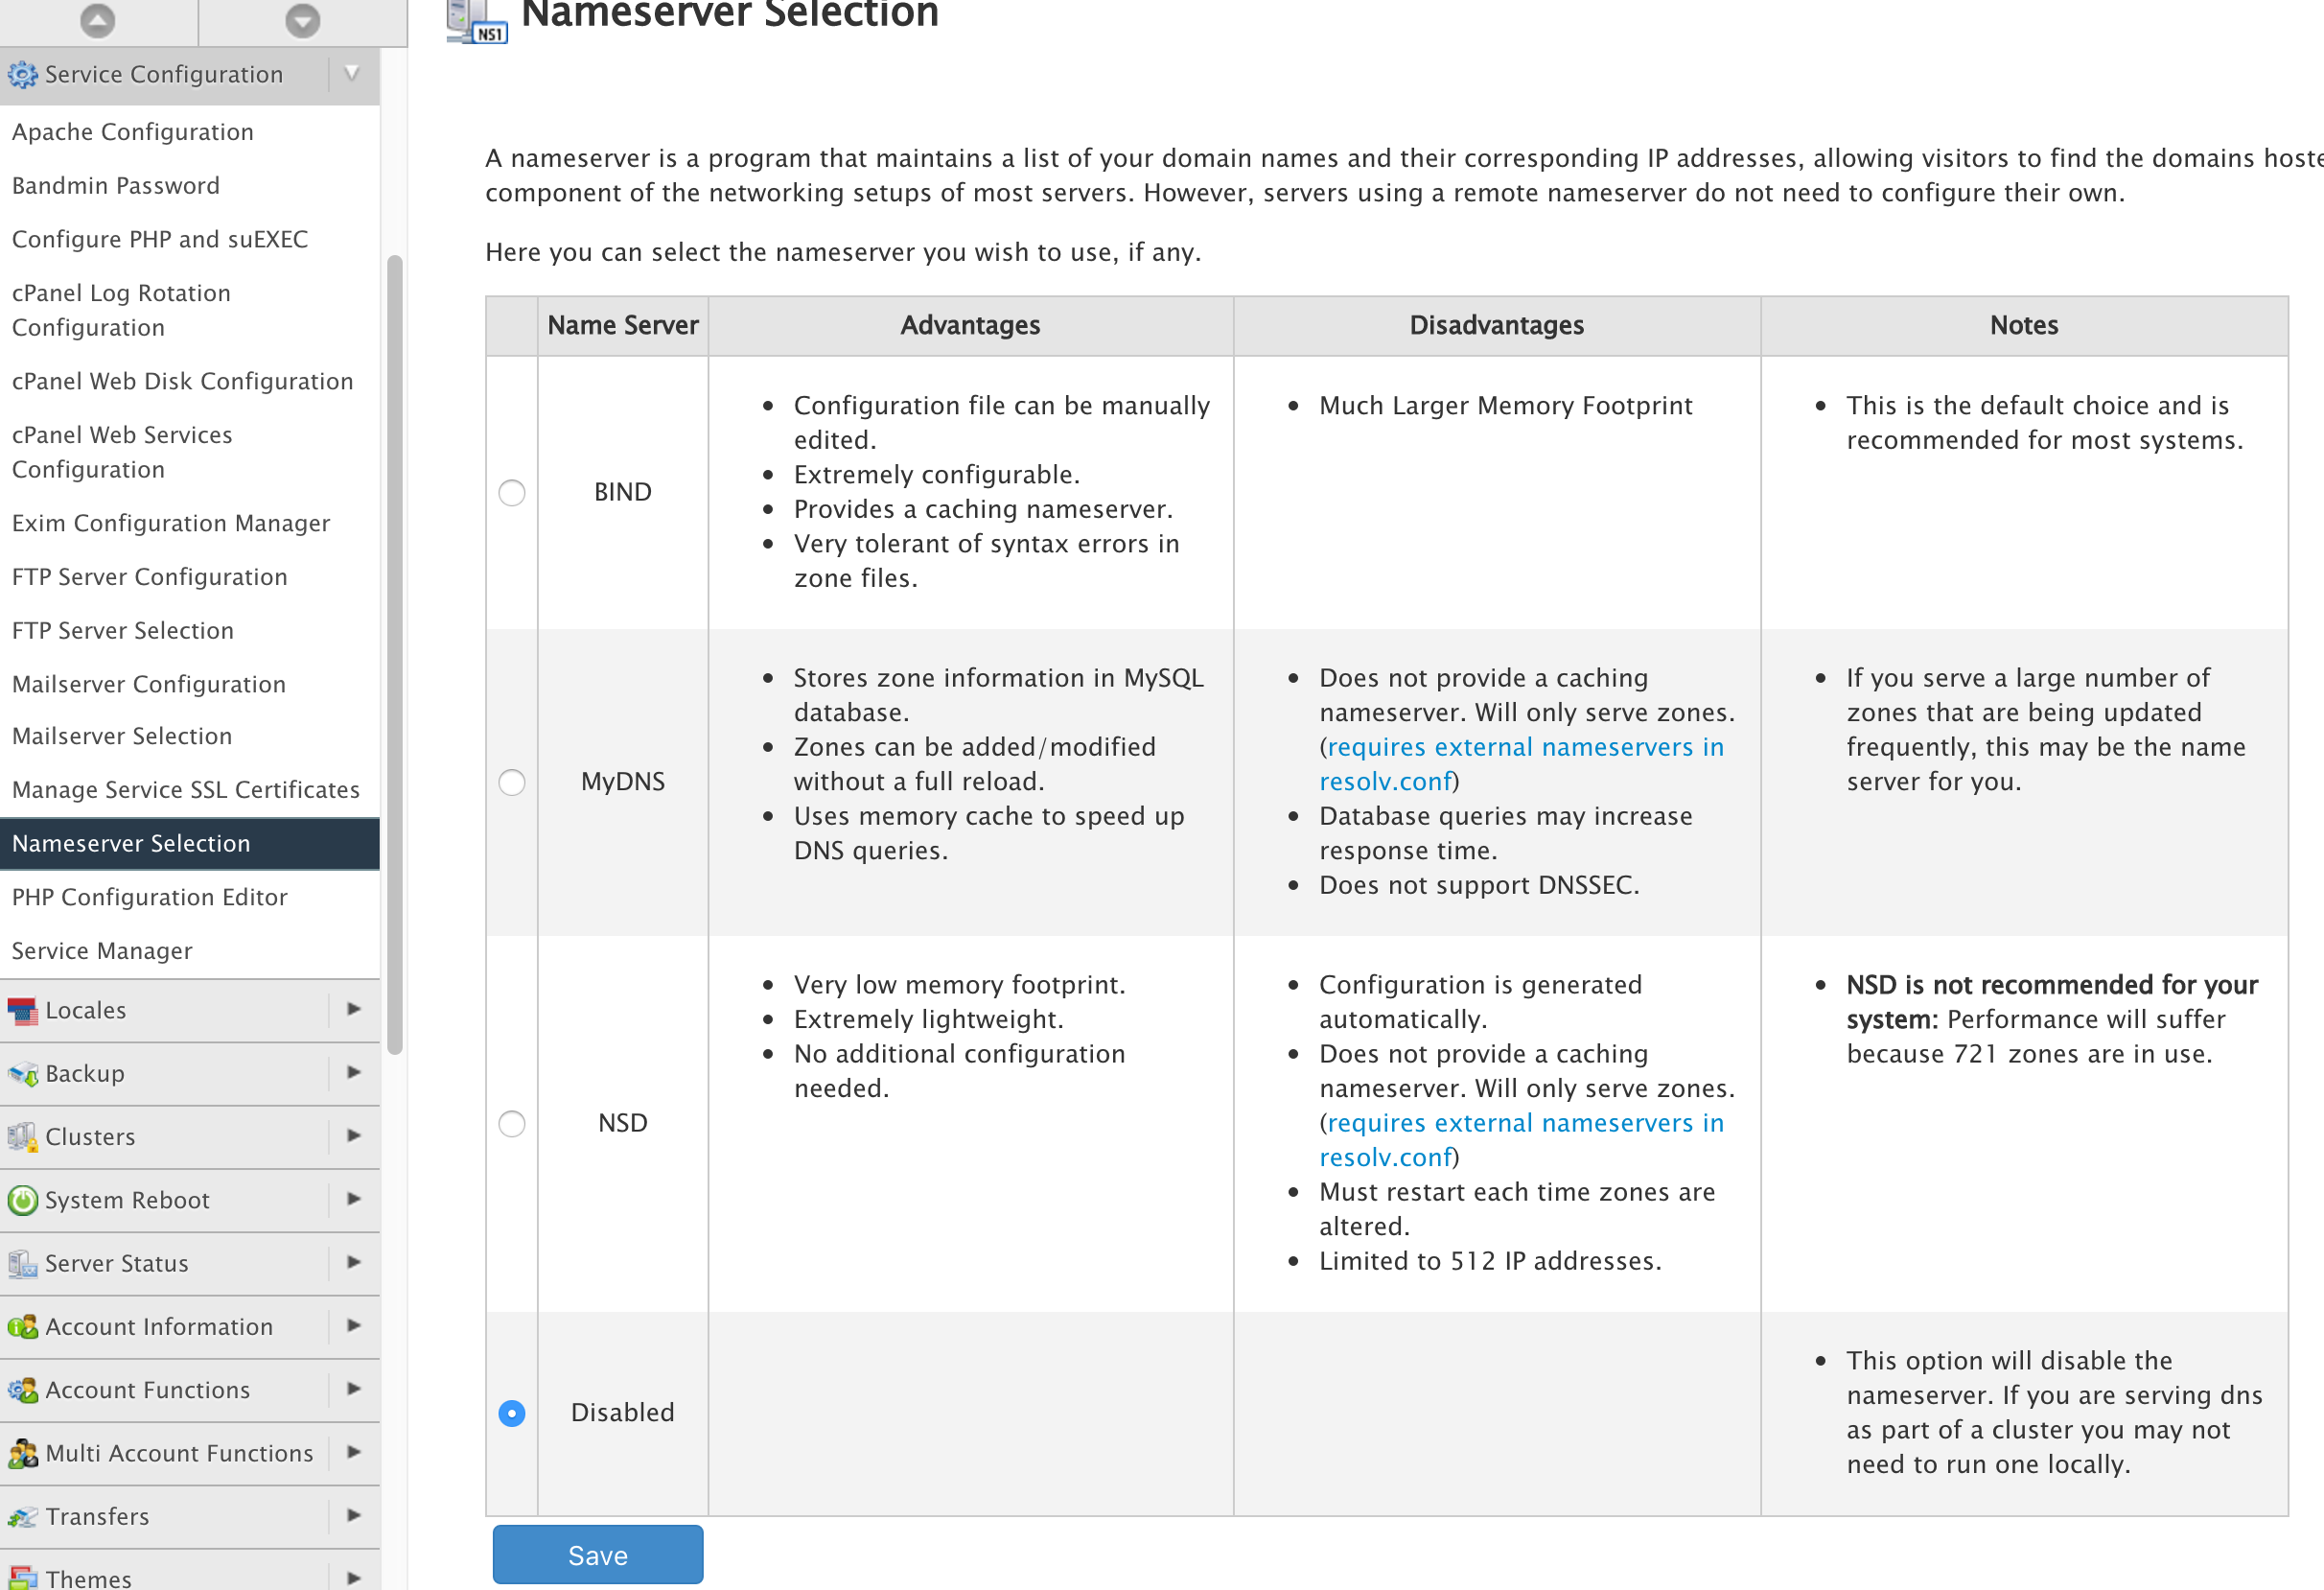
Repeat the process to add the second DNS server. Once that’s done, you can now disable BIND on the main cpanel server by going to Service Configuration > Nameserver Selection. It will not be used as a DNS server any more, but only push DNS records to the separate name servers in the cluster. This way, you will free up resources used by BIND.

disable-bind

You now have multiple DNS servers which automatically stays in sync with your accounts in the cpanel server.

Harden PHP on Cpanel Server with suPHP and open_basedir

If you run a cpanel server and provide hosting services to customers, you really need to take care that one customer should not be able to access another customer’s files. Not doing this will introduce you to a world of pain. Hackers, script kiddies and spammers are the scum of the internet and they do not care how much trouble they cause to others. Your customers may not be malicious themselves but they can also be unaware of their actions in regards to security.

With the popularity of CMS’s like WordPress, Joomla, its very easy to get a website/blog up and running in minutes. For the unaware customer, its also very easy to forget to upgrade their installations and install insecure themes and plugins. These are the main sources for hackers to gain access to their files and account on the server, and if the server is not properly secured, it only takes one customer getting his account compromised to enabling the hacker to access all other files on the server.

Fortunately there’s a way to prevent or at least make it harder for them to do that. We’ll be making use of suPHP and open_basedir.

suPHP

This executes php scripts with the permissions of the script’s owner instead of the user nobody. 

To enable this, apache needs to compiled with mod_suphp. This can be done via easy apache in cpanel.

Inside WHM:

– Go to Software >> EasyApache (Apache Update)

– Click on a previously saved profile and customize it, choose your apache and php version. On the next page, make sure Mod suPHP is enabled/ticked.

– Click on save and build. This should take about 5 minutes. Apache is now compiled with suPHP.

easy-apache

open_basedir

This is a PHP directive found in the php.ini file that restricts the running php script to only certain file directories specified in the directive. For cpanel users, this can be set to the /home/, /usr/local/lib, and /tmp directories. To set the open_basedir, you can do it via WHM or from the command line:

Command/Shell:


# vi /usr/local/lib/php.ini

# open_basedir = "/home/:/tmp:/usr/local/lib/"

From WHM:

Go to Service Configuration >> PHP Configuration Editor
Check “Advanced Mode”, find the open_basedir directive and set the values

open_basedir

/usr/local/lib – This area stores the php.ini files and other configurations which would be needed by the running PHP script.

/tmp – This is default area where PHP stores temporary files like sessions, file uploads, etc. So the script would need access to it.

/home – This is normally where a user’s account is stored. If we want to restrict user to its own user directory (/home/username) then each user should have an independent php.ini file specifying the directory in the open_basedir directive.

Disable user’s custom php.ini

suPHP by default loads a user’s custom php.ini stored in their directory. This enables the user to override the global php.ini settings. A malicious user/script could override the global open_basedir value and the above protection will be lost. To prevent this, we have to ask suPHP to load only the main php.ini file:

Open the suPHP configuration file:


# vi /opt/suphp/etc/suphp.conf

And uncomment the following lines:


;application/x-httpd-php=/usr/local/lib/
;application/x-httpd-php4=/usr/local/php4/lib/
;application/x-httpd-php5=/usr/local/lib/

The above lines should read as below:


application/x-httpd-php=/usr/local/lib/
application/x-httpd-php4=/usr/local/php4/lib/
application/x-httpd-php5=/usr/local/lib/

Now, save the file and restart apache:


# service httpd restart

From what I have noticed, with the above settings, a user can still access another user’s files (/home/user2/), but since cpanel sets a 750 (No permission for others) permission on the public_html folder, it cannot access the other user’s files under public_html (where most of their files will be anyway). So, as long as users don’t change their public_html permission and store most of their files inside public_html folder, its an easier way than creating php.ini files for every single user. For me, it works, so its a decision you have to make yourself.